Publishing an App
Before you begin
Ensure that your app has at least one widget and that all your changes have been saved.
About this task
Publish your app to make it available for users to download. You can choose whether to publish the app to a select group of users or to all users in all groups. SOTI Snap publishes the app for both iOS and Android devices at the same time.
To publish an app:
Procedure
-
Choose where you want to publish the app from
- To publish from the App Manager, hover over an app in a Draft or Inactive state then click Publish.
- To publish from the Canvas, select Publish in the blue bar across the top of the console.
-
In the Publish Settings dialog box, fill in the required information:
-
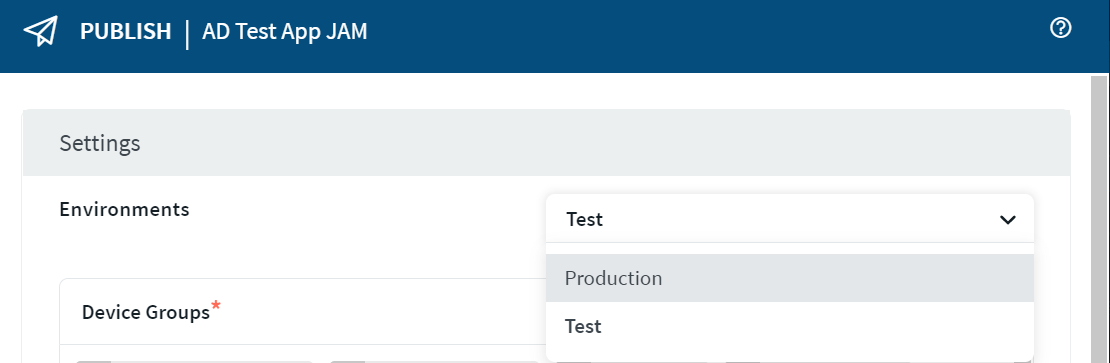
Environments. Select the environment to publish to from the Environments dropdown menu.
-
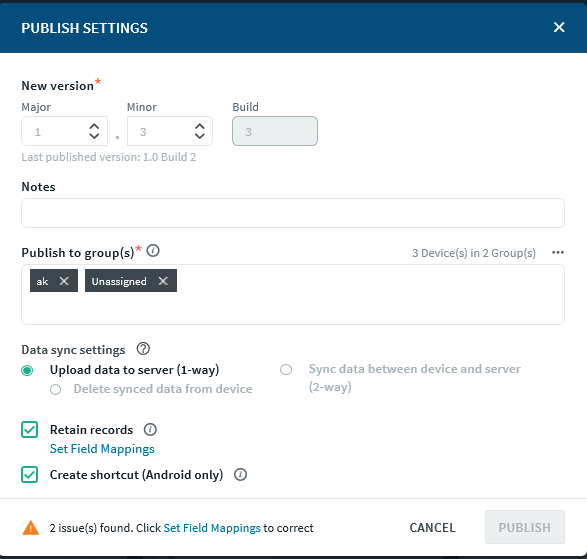
App Versioning. Update the app version using the counter fields under the New version header.
You can change both the Major and Minor version of the app, depending on the significance of the changes you made to the app. It is not recommended that you enter an app version that is lower than a previously published app as it may cause confusion.
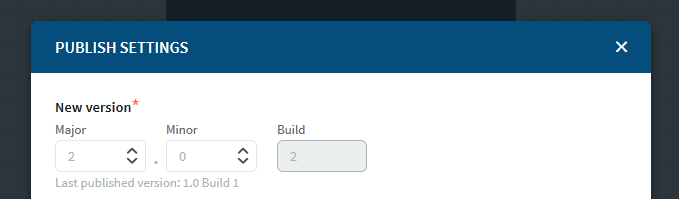
The Build Number is auto-generated by SOTI Snap to differentiate between app versions and cannot be altered.
-
Publish to Groups. Click inside the Publish to group(s) text box to see a list of available groups, or start typing and matching groups will appear. Select the groups you want to publish this app to.
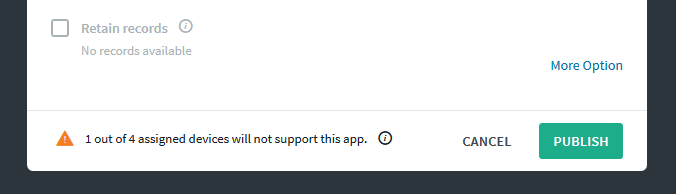
SOTI Snap warns you if any devices in the selected groups are not compatible with the app. You can still publish but incompatible devices won't receive the app. Make sure all devices are active or have the latest SOTI Snap agent installed.
 Tip: You can check the version of the SOTI Snap agent on a device in the list. You can send messages to outdated devices that encourage them to update their SOTI Snap agent.
 -
Retain Records. Select Retain Records to transfer app data from the last published version to the next version, so that previously generated data can be used. Click Set Field Mappings to change or fix any mapping issues indicated at the bottom of the Publish Settings dialog box.
Note: This option is only available for apps that have been previously published and if the Data Sync Settings remain the same as the previously published version of the app.
-
Environments. Select the environment to publish to from the Environments dropdown menu.
- Click Publish.
Results
When your app is published successfully, it will be listed as Active on the App Manager screen.