|
|
SMTP Notification Profile |
When you configure an alert, you have the ability to get notified by sending an email to a user or users indicating the particular event. A Notification Profile allows you to configure the sending email server settings as well as the contents of the message.
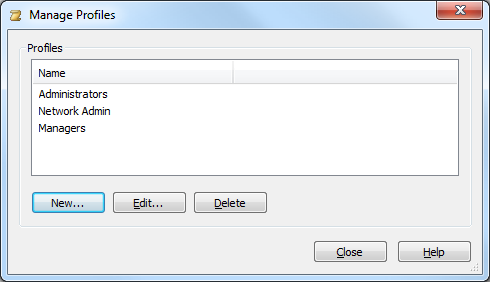
From the Manage Profiles dialog, you have the ability to select an existing profile, create a new profile, edit or delete an already existing profile.
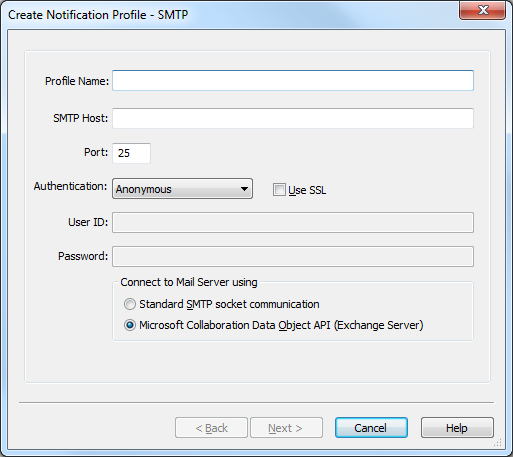
If no email notification profile exists, you’ll need to specify a Profile Name, the SMTP Host, Port, and give the option of different levels of Authentication within the Create Notification Profile dialog. You have the option of having an Anonymous, basic, or NTLM authentication and the ability to enable the use of SSL.
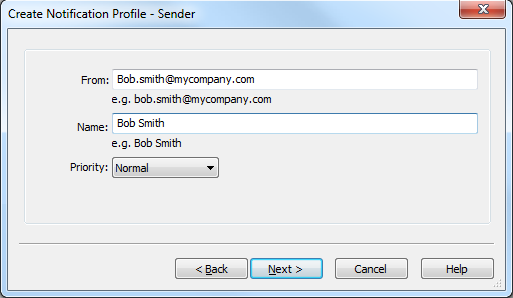
The Sender dialog allows you to specify details of the email address that will be sending the notification. You must also specify a name for that sender which gets displayed in the From field. Optionally, you have the ability to setup a Priority for the email where the available options are Low, Medium and High.
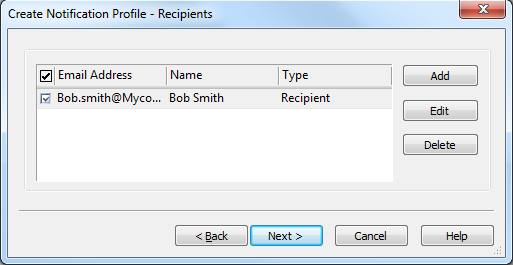
Select the Recipients that should be notified when the particular alert event is triggered. When you click the Add button, you have the ability to setup recipients that would be in the To field, CC field and BCC field as well.
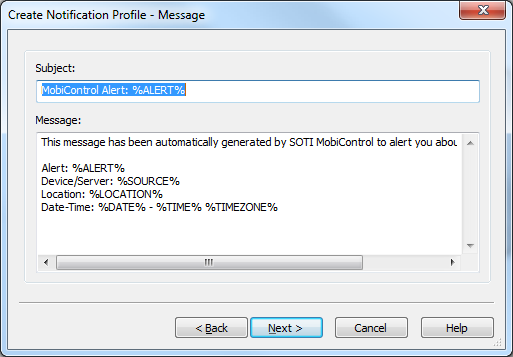
The Message dialog allows you to specify both the Subject and the Message. Variables can be added to both the Subject and the Message as shown in the screen shot above. The entire list of variables that can be used are described below:
| Variable | Description |
|---|---|
| %%ALERT% | Displays the Alert name that was specified when the alert was created. |
| %SOURCE% |
Display the Deployment Server name in the case it is a Deployment Server alert.
|
| %LOCATION% |
Displays the Deployment Server name in the case it is a Deployment Server alert.
|
| %DATE% | Displays the date the alert was generated. |
| %TIME% | Displays the time the alert was generated. |
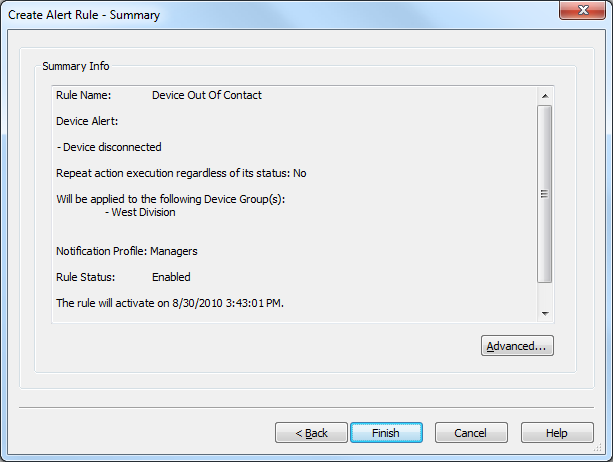
The Create Notification Profile - Summary Information page summarizes the settings configured on the previous pages of the wizard. If you are satisfied with the configured settings, click on the Finish button to create the Create Notification Profile, otherwise use the Back button to go to previous screens and make adjustments. The Test button will send a test email to the recipients to ensure the settings are correct.
After completing the Notification Profile Wizard, click Finish and continue the Alert Rule Wizard here.